Feeds:
Posts
Comments

Archive for November, 2009

I hope everyone had a wonderful Thanksgiving!  This year was a little lonely without my parents down here.  The past three years they have been down to spend Thanksgiving with us, but this year they decided to stay in Atlanta. I have to say I missed my mom’s help in the kitchen this year.  Even though they weren’t here I still cooked the same big Thanksgiving meal.  There was turkey, cornbread dressing, broccoli casserole, sweet potato biscuits, and my favorite sweet potato casserole and to top it off Pecan Pie Cheesecake for dessert.  After naming all these things I’m glad I was able to go running on Thanksgiving morning.  Overall, it was a great day and what better to spend it with my wonderful husband and my girls!  I’m so thankful to have them in my life!  Oh ….and by the way the girls loved Thanksgiving dinner!

Now for these cheese biscuits….I made these for my company’s Thanksgiving Potluck and had several people ask for the recipe so I made another batch.   That way I could photograph them and post the recipe for everyone to enjoy.  It’s a very quick and easy recipe.   I have made these biscuits on several occasions for a quick side.  If you can believe these have no butter.  Paula Dean would probably not approve, but they are just fine without the butter. 

I usually try to capture pictures when the girls are down for their afternoon nap.  This time, I wanted to capture the biscuits right out of the oven.  It also happened to be before nap time!  As you can tell I had two little ones eager to take a bite of these biscuits and the whole time saying “mommy, yummy”. 


You should have seen me too, I was holding out one arm and trying to block them out with my hip it almost felt like I was using my old high school basketball moves.  You know the one!  Basketball wasn’t my best sport either so it probably would have been better if someone took a picture of all this happening!  Thankfully our dog Parker was outside or it would have been three against one!  Not good!  Especially since Parker is a 85 pound golden retriever.

Hopefully, you can enjoy these biscuits when you need a last minute side for dinner.  Again, I hope everyone had a wonderful Turkey Day!! 


Cheese Biscuits

1 cup plus 2 Tbsp all-purpose flour
1 1/2 tsp baking powder
2 tsp sugar
1/2 tsp salt
1/2 tsp Italian seasoning
3/4 cup cheddar cheese, shredded (I used 2%)
1 cup chilled heavy cream
 
Preheat oven to 400 degrees.
 
Whisk together in a large bowl the flour, baking powder, sugar, salt and italian seasoning.  Mix in cheese and then stir in heavy cream until well combine.
 
Using a ice cream scoop with a release scoop 1 tbsp size biscuits onto a baking sheet lined with parchment paper.  Bake the biscuits for 20 to 25 minutes until golden.
Enjoy!

Read Full Post »

The results of the Baked: New Frontier Cookbook giveaway are in and the winner is….

And the # 10 post was Aimee!  My fellow mom of multiples.  Aimee is a mom of triplets.  Can you believe?  Let’s all give her a round of applauds for triplets and the win of course.  Congrats Aimee on the win!  The cookbook is on it’s way to you and I hope you enjoy it!

By the way, I think the next cookbook I will need to purchase is Ree’s cookbook from The Pioneer Women.  If you have never been to her site please do.  She is an amazing lady!  I remember the first time I accidentally stumbled upon her site and I couldn’t tear myself away.  I love how her personality shines and her photography is breathtaking.  Also, do yourself a favor and read her love story of how her and Marlboro Man met!  This is why I couldn’t tear myself away.  She had me laughing and crying!  I think the next thing she should do after the cookbook is publish her love story.  Ok, I’m off to buy my copy of Ree’s Cookbook and if your not sold after seeing everyone’s comments, then maybe hearing that it’s the #2 book on the Amazons Best Selling Cookbooks will convince you?  Way to go Ree!  You are an inspiration to all us food bloggers and mommies!


Read Full Post »


With Thanksgiving coming up this week I was looking for something easy to make this weekend.  I’m not sure how this idea came to me but I’m glad it did because it actually turned out pretty good.  What’s even better it was a perfect snack for the whole family.  I made two versions because I wasn’t sure which one would be best.  I made one version using pizza sauce and cheese with a little bit of spinach for the girls.  They still aren’t pesto fans.  With this version I rolled them up and cut them like you would cinnamon rolls.  Sprinkled with additional cheese and baked them.  I have to say these turned out “prettier” to me then the next version but they both tasted great.  On the second version I mixed a little bit of homemade pesto I had left-over with the tomato sauce and used that for the sauce.  I then used chicken, sundried tomatoes, and mozzarella for the filling.  I also used a little bit of parmesan for the topping which is where I went wrong because it browned too quickly.  So I omitted in the recipe here so you don’t make the same mistake.  Instead I would suggest using mozzarella sprinkled on top.  Another thing I did differently with these was after cutting them I placed them in a muffin tin.  Scott preferred these, but I preferred the rolled version.  They went over great with the girls too which is always great!  These would be great served warm with a little pizza sauce for dipping. 

Now I’m back to planning my Thanksgiving menu.  This year it’s just the four of us.  My parents are staying home.  For some reason this hasn’t changed the amount of food I’m planning to cook.  The thing is I know the leftovers will be eaten by Scott.  It’s the one time of the year he actually eats leftovers!

Also, stay tune till tomorrow’s winner for the cookbook giveaway.  Thanks everyone who left comments. I think the next cookbook I will have to indulge in is Ree’s cookbook.  I’ve actually been wanting it so now it will be a must! 

Enjoy the scrolls!!


Cheesy Pizza Scrolls

Print Recipe

 Dough:

  • 2 cups all-purpose flour
  • 2 tsp baking powder
  • 1 tsp sugar
  • 1 tsp sea salt
  • 1 cup low fat buttermilk

For Cheese Filling:

  • ½ cup tomato sauce (I used Boboli pizza sauce)
  • 1 tsp dried oregano
  • 1 ½ cups grated cheddar cheese (I used 2%)
  • ½ to ¾  cup regular spinach, chopped

Preheat oven to 390 degrees.  In a large bowl, sift together the flour, baking powder, sugar, and salt.  Make a well in the center of flour mixture and place buttermilk in the well and mix to form a soft dough.  Turn dough onto a floured surface and knead until smooth. Roll out to a 12” square.  Place the tomato sauce and oregano in a bowl and mix to combine.

Spread the tomato sauce mixture over the dough and sprinkle with spinach and cheese.  Roll to enclose the filling.  Slice the roll into 9 to 10 pieces and place side-by-side in a lightly greased 8×8 pan lined with parchment paper.  You can sprinkle with additional cheese if you like. 

Bake the scrolls for 25-30 minutes or until golden.


Now for the 2nd version….Chicken Pesto Pizza Scrolls


Chicken Pesto Pizza Scrolls

Print Recipe

Dough:

  •   2 cups all-purpose flour
  • 2 tsp baking powder
  • 1 tsp sugar
  • 1 tsp sea salt
  • ½ tsp oregano
  • 1 cup low fat buttermilk

For Filling:

  • ½ cup tomato sauce (I used Boboli pizza sauce)
  • 1 Tbsp pesto (homemade or store-bought)
  • 1 cup cooked chicken, chopped
  • 2 Tbsp Sundried Tomatoes, diced (not oil packed sundried tomatoes)
  • 1 ½ cups grated mozzarella cheese (I used 2%)

Preheat oven to 390 degrees.  In a large bowl, sift together the flour, baking powder, sugar, oregano and salt.  Make a well in the center of flour mixture and place buttermilk in the well and mix to form a soft dough.  Turn dough onto a floured surface and knead until smooth.  Roll out to a 12” square.

Mix together tomato sauce and pesto. Spread the tomato pesto sauce mixture over the dough and sprinkle with chicken, sundried tomatoes, and cheese.  Roll to enclose the filling.  Slice the roll into 10 pieces and place each piece into a lightly greased muffin tin.  Sprinkle the tops with cheese and bake for 15 minutes.

Read Full Post »

For my birthday my wonderful friend got me a gift certificate to Borders to buy the cookbook of my choice.  She knew I would love a cookbook but had no idea which one.  I have to tell you it was so difficult.  I searched and searched and finally decided on Baked: New Frontiers in Baking

I saw them on Martha and have heard about how great their book was and what finally sold me was they opened a shop in Charleston.  I haven’t been yet but it will be on my stop the next time we head to Charleston.  If your in NYC they also have a shop there too. 

When I finally got my book in the mail I opened immediately and started to flip thru.  Wow!  So many delicious recipes and wonderful pictures to go along.  I have many on my list to make but my first recipe were these Banana Espresso Chocolate Chip Muffins.  The decision was easy since I had very ripe bananas that needed to be used.  I changed the recipe a little by adding some white whole wheat flour and reduced the sugar to 1/4 cup (recipe called for 1/2).  The smell these muffins made while baking was magical.  Of course, the first bite was pretty magical too.  These are great to have in the morning with a cup of coffee or as a dessert. 

As you can tell by the pictures I’m still trying to test my lights.  This daylight savings time is a real bummer.  I miss my natural light!

Oh….and I have a GIVEAWAY!  Would you like your very own copy of Baked: New Frontiers and Baking?  Well you can!  Just leave me a comment and tell me your favorite cookbook and why.  The contest will end Sunday at 12 pm EST and Monday I will announce the winner.  Good luck everyone!!

Banana Espresso Chocolate Chip Muffins

Print Recipe

1 1/2 cups mashed, very ripe bananas (about 4 medium bananas)
1/4 cup sugar
1/4 cup firmly packed brown sugar
1/2 cup (1 stick) unsalted butter, melted
1/4 milk
1 large egg
3/4 cup white whole wheat flour
3/4 cup all-purpose flour
1 tsp instant espresso powder
1 1/2 tsp baking soda
1 tsp salt
1 cup semisweet chocolate chips
 
Preheat oven to 350 degrees.  Spray a 12-cup muffin pan with nonstick cooking spray.
 
In a medium bowl, stir together the bananas, sugar, butter, milk, and egg.
 
In another medium bowl, whisk together the flours, instant espresso powder, baking soda, and salt.  Make a well in thee middle of the dry ingredients.  Pour the wet ingredients into the well and stir until just combined.  Fold in chocolate chips.
 
Fill each cup about three-quarters full.  Bake in the center of the oven for 20 to 25 minutes, until toothpick inserted in the center of a muffin comes out clean.
 
Move the muffin pan to a cooling rack, and let cool for 15 minutes.  After 15 minutes, remove from pan.  Enjoy!

Read Full Post »

Today we had our annual pot luck in the office for Thanksgiving.  When the sign went up to put down what dish you would bring I honestly had no idea what to make.   I knew I wanted to make a dessert and with the space limited I signed up but put TBD.  Of course, I also signed up to bring biscuits too which was a must. After all, biscuits are always on the table at Thanksgiving in the South.  So back to the dessert and the decision….I ended up doing two!  One was the Pumpkin Whoopie Pies I made last month because I got a request from one of my very pregnant co-workers and I couldn’t make her unhappy (Eneri I hope you enjoyed them!).  The other was a huge task…Tri Level Cheesecake!  It’s a level of chocolate chip cheesecake, vanilla and oreo cheesecake all topped with a fudge topping.  The best part is the oreo crust!  I honestly am not a fan of cheesecake so I didn’t take a bite but I will trust all my co-workers who approved and requested the recipe.  Actually the picture above is a piece I had to steal to take home to Scott because he was almost in tears when he found out that the cheesecake was for the office and not him.  Ok, he wasn’t in tears but he was very upset so when I brought this piece home he was very happy.  Cheesecake is one of his favorites. 

I have to admit this cheesecake takes a lot of time.  It’s important the layers set in the freezer too.  I had limited time and I really didn’t want to be up all night. I think if I let the cake sit in the freezer longer you would be able to see the levels more clearly.  Also, if you do try to transport this don’t make the mistake I did….put the fudge topping on at its final destination.  At midnight I think I was too tired and not thinking clearly because I placed the fudge topping on.  You should have seen me driving to work this morning trying to make sure the cake didn’t tumble over.  Of course, I blended right in with some of the other drivers we have in South Florida.  I was actually happy to arrive at work so I could get the cheesecake on safe ground.

Today’s potluck was a huge success and was filled with international cuisine.  Lots of food and all of it was delicious!  I think everyone in the office enjoyed the break and the time together.  We all could have used a nap after stuffing our bellies too.

By the way…Scott loved the cheesecake.  Enjoy everybody!

Tri Level Cheesecake

Print Recipe

Crust:

  • 3 Tbsp sugar
  • 1 1/3 cups oreo crumbs
  • 4 Tbsp unsalted butter, melted

Cheesecake:

  • 2 ½ pounds organic Neufchatel cheese, room temperature
  • 1 ½ cups sugar
  • 1 Tbsp pure vanilla extract
  • 1 Tbsp all-purpose flour
  • 5 large eggs, room temperature
  • ½ cup mini semi-sweet chocolate chips
  • ½ cup oreo crumbs
  • 1/3 cup prepared fudge sauce, optional

Lightly butter the sides and bottom of a 9 inch springform pan.

To Make the Crust:

Mix together the sugar, crumbs, and butter.  Cover the bottom only of the prepared pan with the crumb mixture, using your fingers to press the mixture into an even layer.

To Make the Cake:

Beat the cream cheese on medium-high speed in the bowl of an electric mixer fitted with a paddle attachment.  Add the sugar and vanilla and beat until the mixture is light and creamy.  Scrape down the sides of the bowl.  Beat an additional 30 seconds.  Add the flour and mix to incorporate.  Reduce the speed to low, add the eggs one at a time and mix to incorporate after each addition.  Do not over mix the batter once the eggs have been added.

Divide the batter evenly into 3 separate bowls, about 2 ½ cups each.  Add the chocolate chips to one bowl and mix to incorporate.  Pour this batter over the crust layer, and spread the batter into an even layer.  Place the pan in the freezer for 60 to 70 minutes or until the cheesecake layer is firm.  Add the plain portion into an even layer.  Return the pan to the freezer for 40 to 45 minutes, or until firm.  Add the oreo crumbs to the last portion of batter and pour over the vanilla layer and spread into an even layer.

Preheat the oven to 325 degrees. 

Wrap the bottom of the pan in a double layer of aluminum foil and place the pan in a large roasting pan.  Place the pan on the middle shelf of the oven.  Carefully pour hot water into the roasting pan.  The water should rise half way up the sides of the springform pan.

Bake the cheesecake for 1 hour and 30 minutes.  The cake should be slightly soft in the center.  Remove the springform pan from the roasting pan and remove aluminum foil.  Transfer the cake to a wire rack and cool at room temperature for 1 hour.  Chill the cake for 1 hour and then remove the sides of the springform pan.  Cover with plastic wrap and chill several more hours or overnight.  Garnish with fudge sauce if desired.  Slice and serve.

Read Full Post »

Carrot Cupcakes with Cinnamon


We are two weeks away from the girls 2nd birthday!  It’s so hard for me to believe it’s been another year.  Thinking about it often makes me sad but also happy because they have brought so much happiness to our lives.  There is nothing like coming home from a long day at work with “mommy!” and a big running hug.  It’s priceless and I’m enjoying it while I can because I know as they get older it won’t happen as much.  As their birthday approaches I have been trying to figure out what kind of “birthday” cupcakes I will make this year.  Last year, I made these carrot cake cupcakes.  I convinced myself that these had carrots in them it would be a healthy alternative to chocolate or any other flavor.   The girls didn’t know what to do with these as we placed them on their highchair.  Then again they were overly fascinated with the farm animals I attempted to make out of fondant. 

I had never worked with fondant before and I decide to tackle making farm animals to top some of the cupcakes.  So we had a couple pigs, a cow, and a sheep.  I’m a perfectionist so those four took a lot of time.  Making them was fun but I seriously hated to throw them away after all those hours spent. 

As I say this I’m brainstorming as to what I’m going to spend long hours making this year.  Maybe Sesame Street characters?  Or Dora?  Or what about jungle animals?  All of which are their new favorites.  I think I’m leaning towards jungle animals since they are all about the noises we attempt to make for them all.  Clair often turns to me at dinner and says “mommy, elephant”, which her attempt to get me to do my best elephant imitation.  She then says “mommy, tiger” which is a whole lot easier to do then the elephant.  Not only am I brainstorming about the topping but what about the flavor?  Maybe it will be chocolate this year?  Stay tune to find out.  I’ll be sure to post what the final decision will be.

To help me with my brainstorming and my husband’s request for cupcakes I decided to make the carrot cupcakes while the girls took their nap yesterday.  It didn’t help that I was also craving something sweet.  I ran about 12 miles this weekend so giving into my sweet tooth seemed ok.  I found the carrot cake recipe from Martha Stewart last year and made some minor adjustments.  These are moist and delicious and with the cinnamon cream cheese frosting they are even better.  Enjoy!!


Carrot Cupcakes with Cinnamon Cream Cheese Frosting

Adapted from Martha Stewart

Print Recipe

  • 1 ½ cups all-purpose flour, spooned and leveled
  • 1 tsp baking powder
  • ½ tsp baking soda
  • ¾ tsp salt
  • ½  tsp ground cinnamon
  • ¼ tsp ginger
  • ¼ tsp nutmeg
  • ¾ cup (1 ½ sticks) unsalted butter, melted
  • 1 cup packed light brown sugar
  • 1 large egg
  • 2 Tbsp plain low fat yogurt (can also use Greek Yogurt)
  • ½ tsp vanilla extract
  • 1 ½ cups grated carrots (about 3 or 4 medium carrots)
  • ¼ cup walnuts (optional)

Preheat oven to 375.  Line 12-cup standard muffin tin with paper liners.

In a large bowl whisk together flour, baking powder, baking soda, salt, cinnamon, ginger and nutmeg; set aside.

In another large bowl, whisk together melted butter, brown sugar, egg, yogurt, and vanilla.  Stir in carrots and walnuts (if using).  Gradually add dry ingredients to butter mixture until well combined.  Divide among muffin tin. Bake 25 minutes, rotating pan halfway through until a toothpick inserted in center comes out clean.

Let cool on a wire rack in pan for 5 minutes.  Then remove from pan to a wire rack to cool completely before frosting.


 cupcake with cinnamon cream cheese

Cinnamon Cream Cheese Frosting

  • 1 package (8 ounces) organic Neufchatel cheese, room temperature
  • ¼ cup (1/2 stick) unsalted butter, room temperature
  • 1 cup confectioners’ sugar
  • 1 ½ vanilla extract
  • ¼ to ½ tsp cinnamon

Using an electric mixer, beat cream cheese, butter, and confectioners’ sugar until smooth; beat in vanilla and cinnamon.  Top each cupcake with 2 tbsp of frosting and spread to cover.  You can also pipe the frosting onto the tops of the cupcakes.

Read Full Post »

Apple Cinnamon Muffin

I found this in the Oprah magazine my mom left behind from her recent visit to see us and I loved it!  I wanted to share it with everyone.  I hope it speaks to you as it did me.

“When I walk into my kitchen today, I am not alone.  Whether we know it or not, none of us is.  We bring fathers and mothers and kitchen tables, and every meal we have ever eaten.  Food is never just food.  It’s also a way of getting at something else: who we are, who we have been, and who we want to be.”

Molly Wizenberg – From a Homemade Life


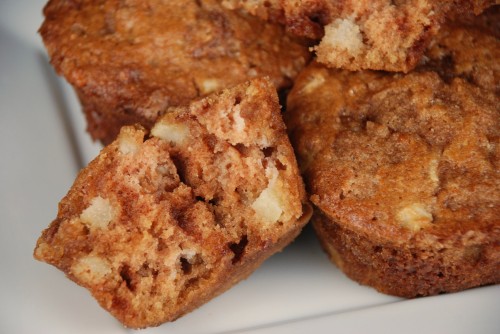
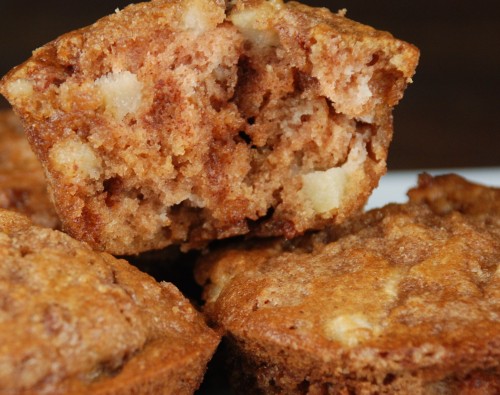
Now for the recipe, I know two apple recipes in a row and you’re probably worried I’m going to do a streak of apple recipes like I did with pumpkin…..don’t worry.  I just had one more granny smith apple that I had to use.  These muffins are moist and delicious and are filled with all the right combination of ingredients.  I made a batch of these this weekend and I didn’t even have time to photograph them because Scott ate them all.  So the other night I made another batch and I made sure I got pictures this time.  These are great for breakfast, as a snack, or even as a dessert.  Enjoy!!


Apple muffins


Apple Cinnamon Chip Muffins

Print Recipe 

  • 1 cup white whole wheat flour
  • 1 cup all-purpose flour
  • 1 tsp baking soda
  • 1 tsp apple pie spice
  • ½ tsp salt
  • ½ cup unsalted butter, room temperature
  • 1 cup sugar
  • 2 eggs
  • 1 ¼ tsp vanilla extract
  • ½ cup unsweetened applesauce
  • 1 ½ cups tart apples, chopped (such as granny smith)
  • ½ cup mini cinnamon chips

Topping and Middle Layer

  • ½ cup light brown sugar
  • 2 Tbsp white whole wheat flour
  • ¼ tsp cinnamon
  • 2 Tbsp butter, cold and cut in cubes

Preheat oven to 375.  Spray a muffin pan with nonstick spray or use muffin liners.

In a medium bowl, mix flour, baking powder, baking soda, salt, and apple pie spice.

In a large bowl, beat together butter, sugar, and eggs until smooth.  Mix in vanilla and applesauce.  Stir in apples, and gradually blend in the flour mixture.  Fold in cinnamon chips. Set aside

In a small bowl, mix brown sugar, flour, and cinnamon.  Cut in butter with a pastry cutter until mixture is like coarse crumbs.

Spoon ½ Tbsp into prepared pan and top with cinnamon sugar mixture.  Then top another ½ Tbsp into muffin cups and finally top with more of the cinnamon sugar mixture.  You will make about 18 muffins.

Bake for 18 to 20 minutes, or until toothpick inserted comes out clean.  Cool on wire rack. 

Store in a airtight container for three days.  You can also freeze half and when your ready to enjoy let them thaw at room temperature or microwave.

apple cinnamon muffin

Read Full Post »

Apple Turnover


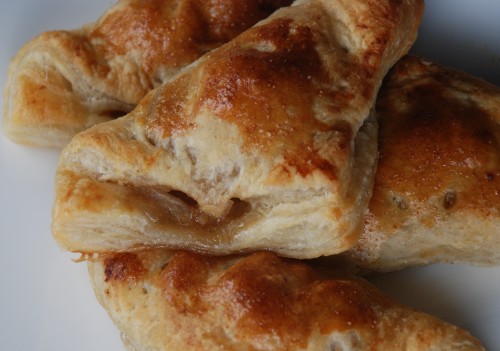
It’s been a week and I’ve been having baking withdrawals!  So I got back in the kitchen and started to bake away.  My first baking adventure was using another fall favorite ingredient….apples!  I love apples!  This weekend Whole Foods had huge granny smith apples and I couldn’t resist the purchase.  The next thing I had to do was figure out how I was going to use them.  On that same trip to Whole Foods I picked up a package of Dufour puff pastry.  As my mind raced it all started to come to me.  Apple Turnovers!  I have to admit I never tried making these delicious treats, but I thought it couldn’t be too difficult.  Especially with the best premade puff pastry.  One of these days I will try to make my own but in the meantime I’ll keep using what I know is good.  Combining apples, cinnamon, vanilla, and brown sugar is a wonderful thing.  Even better is the smell they make while baking in the oven.  Even though it’s still in the 80’s here in South Florida I forgot all that in the 15 minutes these baked.  The smell made me feel like it was fall outside.  The smell also brought Scott downstairs to see what I was whipping up in the kitchen.  He couldn’t finish his dinner fast enough just to get to the turnovers.  After one he continued to the second.  These were a hit and hopefully they are a hit with your family.  I will have to let you know what the two little ones think of them in the morning.  Enjoy!!

Turnover apple

Apple Turnovers

Print Recipe

  • 1 frozen puff pastry sheet, thawed (I suggest Dufour)
  • 1 large baking apple (I used a Granny Smith), peeled, cored, diced
  • 3 Tbsp chopped walnuts (or pecans)
  • ¼ cup light brown sugar
  • ½ tsp apple pie spice (if you can’t find you can use cinnamon)
  • ½ tsp corn starch
  • ¼ cup unsweetened applesauce
  • ¼ tsp vanilla extract
  • 1 large egg, lightly beaten
  • 1 tsp milk


Place oven rack in the lower third of oven and pre-heat oven to 400.  Line a baking sheet with parchment or Silpat.

In a medium bowl, mix together apples and walnuts with sugar, apple pie spice, and corn starch, making sure the fruit and nuts are well coated.  Mix in the apple sauce and vanilla.

Apples

In a small bowl, mix the beaten egg with a teaspoon of milk.  Set aside.

Unfold the thawed pastry sheet on a lightly floured surface.  Roll out pastry to a rectangle and cut into 5×5-inch or 4×4-inch squares.  I was able to get about 12 squares.  I used a pizza cutter to help in cutting the squares.

Place about a tablespoon of the apple mixture among the squares, leaving a 1-inch border.  Fold each pastry into a triangle, enclosing the filling, and crimping edges with a fork.  Brush the tops of the pastries with the egg wash.  Cut 2 small steam vents in the top of each turnover.

Turnovers on pan

Place pastries on prepared pan and bake at 400 for 15 minutes, or until puffed and golden.  Cool turnovers to warm before serving.

Enjoy and Happy Fall!

Read Full Post »

Couscous Salad


My mom requested my couscous salad recipe shortly after I started my blog, but as you can tell it took me awhile to post it.  Sorry mom!  I made this salad a lot when I was pregnant with the girls.  Once I found something that I could keep down I would make it all the time until basically I was tired of it.  It’s taken me a long time to eat these “things” that I ate when I was pregnant.  Other examples are peanut butter and cereal.  I have just started to eat those again and it’s been over 2 years now since I was pregnant.  Maybe that’s why it’s taken me so long to post this mom? 

Couscous makes an excellent salad when tossed with a mixture of vegetables and chicken.  I have made this salad on several occasions for potlucks in the office or for a summer BBQ.  It’s a refreshing salad that can be enjoyed as a side or even as a main dish.  Take it from me because tonight it was my dinner.  It also tells you something when my mom requests a recipe from me!  I do have to warn you it is a lot of chopping of vegetables and chicken but it’s worth it in the end.  For the chicken, I used a rotisserie chicken that happened to be on sale at Whole Foods.  It’s always great when that happens!

 Hopefully you fine this salad as enjoyable as I have!


Chicken and Vegetable Couscous Salad

Print Recipe

  • 1 cup couscous
  • 1 ½ cups low-sodium chicken broth
  • 3 Tbsp extra-virgin olive oil
  • ¼ cup fresh lemon juice
  • ½ tsp minced garlic
  • Fresh ground pepper
  • 1 ½ to 2 cups cooked chicken, diced
  • ½ cup thawed, frozen peas
  • ½ cup green onion, thinly sliced
  • ½ cup red bell pepper, diced
  • ½ cup English cucumber, diced
  • ¼ cup fresh flat-leaf parsley, finely chopped
  • 3 Tbsp fresh basil, finely chopped
  • 3 Tbsp parmesan cheese, grated

Bring the 1 ½ cups of low-sodium chicken broth to a boil.  After bring to a boil remove from the heat and add the 1 cup of couscous.  Cover and let set 5 to 10 minutes.

In a small bowl, whisk together the olive oil, lemon juice, garlic, ¼ tsp salt, 1 Tbsp water, and a couple grinds of pepper and blend well.

In a large bowl combine the chicken, peas, green onion, red bell pepper, cucumber, parsley, and basil. 

Couscous Chicken Salad

Add dressing and parmesan to mix and toss well.  Then gradually add in the couscous and toss again until well blended.

Serve alone or as a side.  I love it because it’s great to pack for my lunch.  Easy and quick!  Enjoy!


couscous veg chik salad

Read Full Post »

Guac and Crab Dip

It’s football season!  Scott usually can’t wait for September 1st to arrive.  The start of college football!  So on Saturday and Sunday it’s pretty normal that football will be on the TV and if it’s not football it’s Dora or Wonder Pets.  I prefer Saturdays to Sundays because college football is so much more entertaining to me.  Scott’s a South Carolina fan and I really don’t have a team of choice.  I went to a Savannah College of Art and Design which didn’t have a football team and even though I grew up in Georgia I’m not a UGA fan or Georgia Tech fan.  I know many of my friends would be upset that with that comment as most of them went to UGA or GATech.  Either way college football is an exciting time and with that, comes a need for a snack while watching the game.  If your house is the same as mine around this time of the year and you need a game day idea here is a little twist to your traditional guacamole.  It’s guacamole with lump crab meat.  You can adjust the amount to how much you prefer the taste of the crab.  It’s fresh and super easy to make.  I’m addicted to Stacy’s Pita Chips so I paired mine with pita chips but choose the chip of your choice. 

Guacamole with Crab


Avocado and Crab Dip

Print Recipe

  • Two avocado
  • One tomato, diced
  • ½ cup to ¾ cup lump crab meat
  • 1 garlic clove, minced
  • ¼ cup cilantro, chopped
  • Salt and pepper to taste

Place avocado, tomato, garlic, and cilantro in a food processer and process until well mixed.  Place avocado mix into a bowl and stir in the lump crab meat and season with salt and pepper.

Serve with chip of choice. 

Enjoy your weekend everyone and of course enjoy the football!  South Carolina is up against Arkansas.

Read Full Post »

Older Posts »