Feeds:
Posts
Comments

Archive for October, 2009

Brownie Bites

Happy Halloween everyone!  Today our family started celebrating Halloween a day early.   I took the girls to the local play gym for their Halloween event.  The class was packed with 25 kids and their parents.  Pure chaos, but a lot of fun!  I was all by myself with the girls and times like these I wish I had extra arms and extra eyes because the girls went in opposite directions of each other.  They both wanted to do their own thing.  One was in the foam pit while the other was trying to hang from the monkey bars.  I think all parents with multiples wish they had extra hands and eyes.  Wouldn’t that be great?  Or maybe I should have gone as Inspector Gadget?  That would have been great to press a button and my long arms could reach across the room.  Maybe next year?  Speaking of costumes, when I had the chance I got to get quick glimpse of all the different costumes and they were all great!  There was a fireman, a pirate, a cowgirl, a ladybug, a ballerina, and so much more.  This year the girls are a lily fairy and a rose fairy.  Here is one of the pictures I was actually able to capture of both of them together.

 Halloween 2009 038

It’s amazing to think a year ago they could hardly walk.  Here they are last year for their very first Halloween.  My little bee and ladybug!

 Halloween 2008

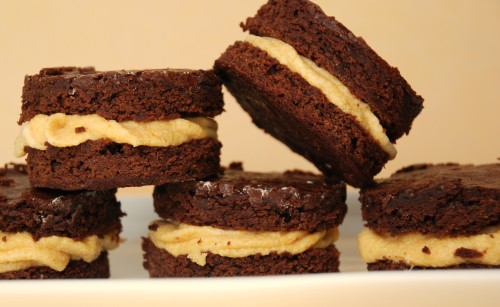
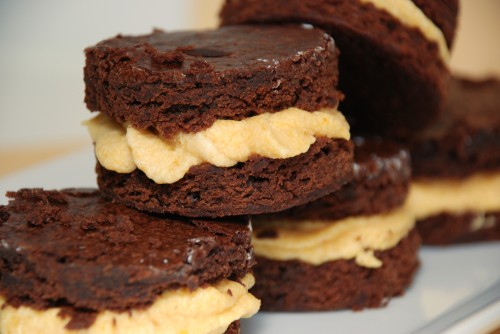
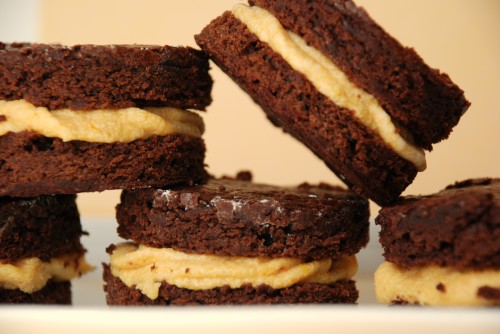
Now to celebrate Halloween I made these delicious brownie bites.  They are brownies cut into rounds, then halved, and then I placed pumpkin cream cheese between the halves.  Yummy!  These would be great if you need a last minute treat to take to a Halloween party.  If they are last minute you could always used a boxed mix for the brownies.  If you never had homemade brownies and have time I would recommend making them from scratch.  I took these treats into the office earlier this week since it would be too much of a temptation if they stayed in my house.  They were hit with everyone. 

I hope everyone has a wonderful and safe Halloween this year!  If you have time to make these treats please enjoy!! 

Brownie Bites

Brownie Bites with Pumpkin Cream Cheese Filling

Print Recipe

Brownies

  • 1 ¼ cup cake flour
  • ½ tsp salt
  • ¾ tsp baking powder
  • ½ tsp espresso powder
  • 6 ounces unsweetened chocolate, chopped fine
  • 12 Tbsp (1 ½ sticks) unsalted butter, cut into six 1 inch pieces
  • 2 cups brown sugar (light or dark)
  • 4 large eggs
  • 1 tbsp vanilla extract

Adjust oven rack to middle position; heat oven to 325 degrees.  Line a 9×13-inch baking dish with foil; allowing excess to lay over the pans edges.  Spray foil-lined pan with nonstick cooking spray.

Whisk together flour, salt, baking powder, and espresso powder in a medium bowl; set aside.

Melt chocolate and butter in a large heatproof bowl set over saucepan of almost simmering water, stirring occasionally, until smooth.  You can also melt in the microwave in 30 second intervals until chocolate is smooth.  Once chocolate mixture is completely smooth, let cool slightly.  Test with your finger it should be like a warm bath.  Once chocolate mixture has cooled slightly, whisk in brown sugar.  Whisk in eggs one at a time until thoroughly combined.  Whisk in vanilla.  Add flour mixture in three additions, folding with a rubber spatula until batter is completely smooth.

Transfer batter to prepared pan; using spatula, spread batter into corners of pan and smooth surface.  Bake until toothpick inserted in center comes out with a few moist crumbs, about 25 to 30 minutes.  Make sure you don’t over bake your brownies or they will be more cake like.  Cool on a wire rack to cool completely.  Once cooled completely lift the brownies out of the pan using the foil overhang.  Using a 1” round biscuit cutter, cut rounds out of brownies.  I dipped my 1” round cutter in confectioners’ sugar to help the brownies release easier.  You will make about 14 rounds in total.  Once rounds are cut then cut each round in half.   

Pumpkin Cream Cheese Filling

Adapted from Martha Stewart

  • 4 ounces organic Neufchatel cheese, room temperature
  • ½ cup (1 stick) unsalted butter, room temperature
  • ½ cup confectioners’ sugar (I added a little more about ¼ cup), sifted
  • ¼ cup canned solid pack pumpkin puree
  • 1/8 tsp cinnamon
  • 1/8 tsp nutmeg

In a bowl of a mixer fitted with the paddle attachment, cream butter until smooth.  Once smooth add the cream cheese and whip until smooth.  Gradually add confectioners’ sugar to the bowl, on medium speed mix until smooth, about 3 minutes.  Add pumpkin, cinnamon, and nutmeg; whip until smooth, scraping down the bowl as necessary.  

 Brownie Bites 2

Assembly of Brownie Bites:

Transfer filling to a disposable pastry bag and snip end.  When brownies have cooled completely and you have cut the rounds and then cut them in half pipe a large dollop of filling on the flat half of brownie half then top with the matching half, pressing down slightly so that the filling spreads to the edges of brownie.  Transfer finished brownie bites to an airtight container and refrigerate 30 minutes before serving and up to 3 days.
Read Full Post »

Whoopie Pies 008

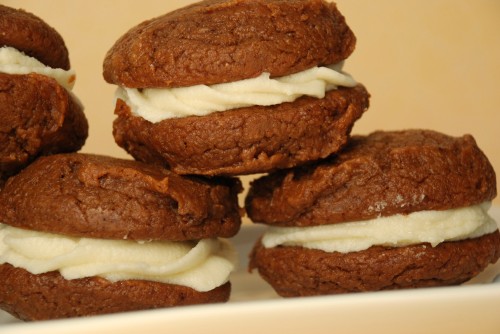
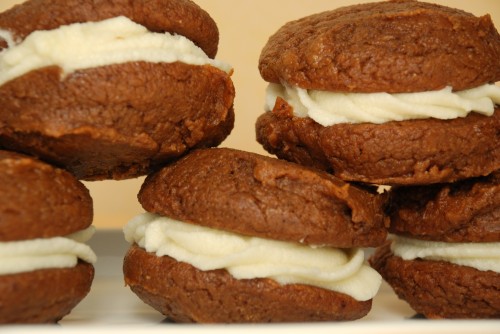
Ok, I’m officially obsessed with pumpkin!  I can’t stop thinking about these small, medium and large orange things!  Maybe it’s because they are on every door step in the neighborhood, or that I pass a pumpkin patch every day to and from work, or maybe because it’s the girls new favorite word?  But in all honesty I think it’s because pumpkin tastes so darn good and when using it in something it makes the house smell heavenly.  Not only that but it’s a fall favorite ingredient.  And everyone knows how much I love fall!  Fall marks that time of the year that I love being in my kitchen.  So once again I have a pumpkin recipe for all of you out there.  Trust me when I say this, it’s the best one yet!  Pumpkin Whoopie Pies, a soft outer pumpkin spiced cookie with a creamy cream cheese filling. Is your mouth watering yet?  Mind is!  If you have never had a Whoopie Pie, they remind me of an inside out cupcake.  The difference is that the icing is tucked inside instead on top of the cake/pie part.  With many of the traditional whoopie pie recipes out there they have shortening in them.  However, I prefer not to bite into something that has shortening in it.  I don’t like the taste and I really don’t like the idea of shortening.  With this recipe I tried to use “healthy” alternative ingredients.  You’ll find I used half white whole wheat flour and substituted half of the oil for unsweetened applesauce.  For the cream cheese filling, I used a organic Neufchatel cheese which is lower in fat than your traditional cream cheese.   I found mine in my local grocery store and it’s also available at Whole Foods if you have one nearby.  If you can’t find it you can always use regular cream cheese.

I brought in these early Halloween treats to the office and everyone loved them.  The best part is they are easy to transport!  If you have ever tried to transport cupcakes to a party or event I’m sure there have been times where you have gotten to your final location and found that the icing isn’t as you placed it.  With these little treats the transporting is easy because the icing is tucked inside. 

These are tasty little treats for anyone in the house.  Great option on the dessert table for the kids at Thanksgiving too.  Enjoy!!


Pumpkin Whoopie Pies with Cream Cheese Filling

Print Recipe

  • 1 ½ cups white whole wheat flour
  • 1 ½ cups all-purpose flour
  • 1 tsp salt
  • 1 tsp baking soda
  • 1 tsp baking powder
  • 2 Tbsp ground cinnamon
  • 1 Tbsp ground ginger
  • 1 Tbsp ground cloves
  • 1 cups firmly packed dark brown sugar
  • ½ cup unsweetened applesauce
  • ½ cup canola oil
  • 3 cups pumpkin puree, chilled
  • 2 large eggs
  • 1 tsp vanilla extract

Cream Cheese Filling

  • 3 cups confectioners’ sugar, sifted
  • ½ cup (1 stick) unsalted butter, room temperature
  • 8 ounces organic Neufchatel cheese, room temperature
  • 1 tsp vanilla extract

To make the pies:

Preheat oven to 350 degrees.  Line two baking sheets with parchment paper or a nonstick baking mat; set aside.

In a large bowl whisk together flours, salt, baking powder, baking soda, cinnamon, ginger, cloves; set aside.  In another large bowl, whisk together brown sugar, oil and unsweetened applesauce until well combined.  Whisk in chilled pumpkin puree, vanilla extract and the eggs one at a time until well combined.  Whisk in flour mixture, in three additions, into the pumpkin mixture until fully incorporated. 

Using a small ice cream scoop with a release mechanism, drop heaping tablespoons of dough onto prepared baking sheets, about 1 inch apart.  Transfer to oven and bake until pies are just starting to crack on top and a toothpick inserted into the center of each pie comes out clean, about 15 minutes.  Let cool completely on pan.

To make the filling:

Sift confectioners’ sugar into a medium bowl; set aside.  In the bowl of an electric mixer fitted with the paddle attachment beat butter until smooth.  Add Neufchatel cheese (or cream cheese) and beat until well combined.  Add confectioners’ sugar and vanilla, beat just until smooth.  Filling can be made up to a day in advance.  Cover and refrigerate.  Let stand at room temperature to soften before using.

Whoopie Pies 007

To assembling Pies:

 Transfer filling to a disposable pastry bag and snip end.  When cookies have cooled completely pipe a large dollop of filling on the flat side of one half of the pies.  Sandwich with remaining pies, pressing slightly so that the filling spreads to the edges of the pies.  Transfer to an airtight container.  Refrigerate cookies at least 30 minutes before serving and up to 3 days.

Read Full Post »

Baked Turkey Pasta

Ok, I’ve had a lot of baked goods lately so I thought I would post something different today.  You will find during the holidays I prefer baking over anything else.  I think it’s because my mom baked a lot during the holidays as I was growing up.  So in ways maybe it makes me feel like home?  I can’t wait for the day I get to bake with the girls.  They already try to help.  Clair keeps a close eye on the oven as it heats up.  Laine on the other hand just constantly asks for a bite.  I try to tell her it’s not quite ready yet.  So for those of you who prefer baked goodies don’t worry I am working on something in the kitchen tonight that I will post in the coming days that will satisfy your sweet tooth. 

Now onto today’s post…

On weekends and week nights I’m all about easy and quick meals.  It’s an added bonus if the meals make plenty of leftovers.  The first time I made this I would have thought Scott was in heaven.  He kept saying it was the best pasta he has had.  Knowing that we have been to great restaurants and had plenty of pasta dishes, I was convinced he was just really hungry that night.  However, every time I’ve made this dish he seems to love it even more.  Not only does he love it, but the girls do too.  So it’s all the more reasons why I make this dish for my household.  Even our dog Parker waits patiently as the turkey sausage cooks to see if I may drop a bite on the floor for him.    

When I make this dish I try to go the healthy route and use whole wheat pasta and turkey sausage, but please use what you prefer.  Its great heated up as leftovers too.  Just a little hint when heating this up in the microwave; add a tablespoon of water to keep the pasta moist. 

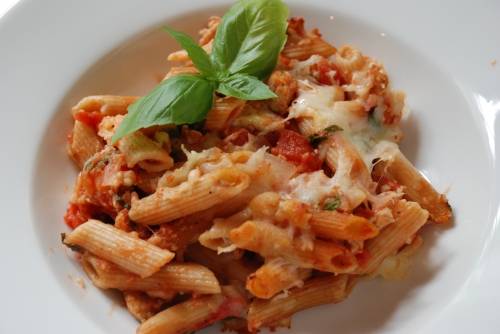
Baked Turkey Sausage, Tomatoes, Spinach and Cheese Pasta

Adapted from Cooking Light

Print Recipe

  • 1 (1 pound) package uncooked penne pasta
  • 1 pound Mild Turkey Sausage links
  • 1 cup onion
  • 2 garlic cloves, minced
  • 1 Tbsp tomato paste
  • ½ tsp salt
  • ¼ tsp black pepper
  • 2 (14.5 ounce) cans petite-diced tomatoes, undrained
  • ¼ cup chopped fresh basil
  • ½ cup chopped fresh spinach
  • 1 cup shredded mozzarella cheese
  • 1 cup grated fresh parmesan cheese

Preheat oven to 350.

Cook pasta according to package directions, omitting salt and fat.  Drain pasta, and set aside.

Remove casings from turkey sausage.  Cook sausage, onion, and garlic in a large nonstick skillet oven medium heat until browned, stirring to crumble.  Add tomato paste, salt, pepper, and tomatoes, and bring to a boil.  Cover, reduce heat, simmer 10 minutes, stirring occasionally.

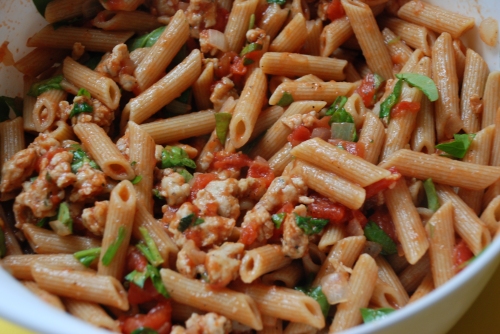
Combine cooked pasta, sausage mixture, spinach and basil.


pasta mix

Place half of the pasta mixture in a 4-quart casserole dish coated with cooking spray.  Top with half of mozzarella and half parmesan.  Repeat layers.  Bake at 350 for 25 minutes or until bubbly. Enjoy!!

Read Full Post »

Halloween Blondies

First of all thank you everyone for all your nice comments on the Halloween Lollipops.  I’m so happy that everyone enjoyed my idea.  It’s always nice to see your comments and even better to know that others besides friends and family are reading my blog.  So again, thank you!

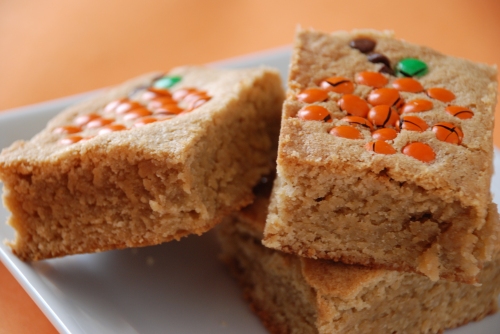
To continue with the Halloween theme, I thought I would post another recipe I  included in the gift package I sent my wonderful nieces in California.  These blondies were really easy and fun to make.  I added the idea of the pumpkins on top using mini M&M’s and mini chocolate chips.  It’s so fun to be creative in the kitchen.  I guess going to art school is paying off.  My parents will be happy to know that my 4 years at Savannah College of Art and Design are being used in many ways.  If you don’t have the patience to shape pumpkins on top of the batter with the mini M&M’s then you can also lay regular M&M’s across in Halloween colors.  Or even Reese’s piece could work!  You could also do brownies as the base too.  I might try brownies next time.  Blondies are a favorite with my husband so he wasn’t happy when I told them they were for our nieces.  The good thing was I cut the edges off which he finished off very quickly and was very happy in the end.  As you can see by the pictures the mini M&M’s did crack so I have to warn you that it may happen.  They still came out cute in the end though.  Enjoy the recipe and again have fun making these Halloween treats! 

Top View Halloween Blondies

Halloween Blondies

Print Recipe

  • 1 cup (2 sticks) unsalted butter, room temperature
  • 1 cup packed light brown sugar
  • 1/2 cup Sucanat (or 1/2 cup white sugar)
  • 2 large eggs
  • 1 ½ tsp pure vanilla extract
  • 1 cup all-purpose flour (spooned and leveled)
  • 1 cup white whole wheat flour (spooned and leveled)
  • 1 tsp salt
  • Orange and Green Mini  M&M’s
  • Mini Semi-Sweet Chocolate Chips

Preheat oven to 350. Spray an 8 inch square baking pan with cooking spray; line pan with parchment paper leaving a 2 inch overhang on two sides.  Spray paper with cooking spray.

In a large bowl, whisk together butter and sugar until smooth.  Whisk in vanilla and eggs one at a time.  Add flour and salt; stir just until moistened.  Transfer batter to prepared pan and smooth top. 

Arrange orange mini M&M’s in a circle to make the shape of a small pumpkin.  For the stem, place the mini chocolate chips and add one green mini M&M for the leaf on the pumpkin.  You will be able to make about 6 to 7 pumpkins per 8-inch pan.  Make sure you spread them apart so each pumpkin can be on one square.

Bake until top of blondies are golden and toothpick inserted in center comes out clean, 40 to 45 minutes.  Set pan on wire rack and let cool completely before cutting.  When I cut the blondies I cut the edges off.

Read Full Post »

Lollipops

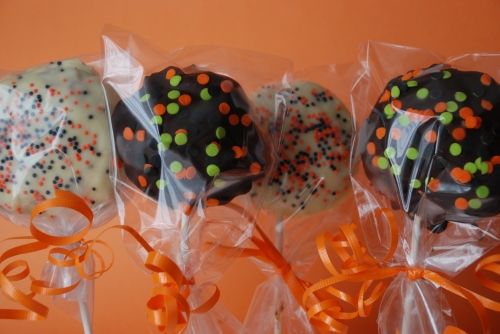
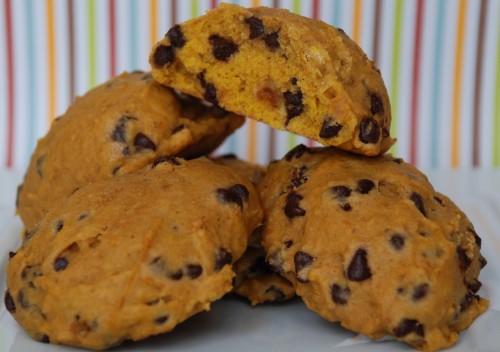
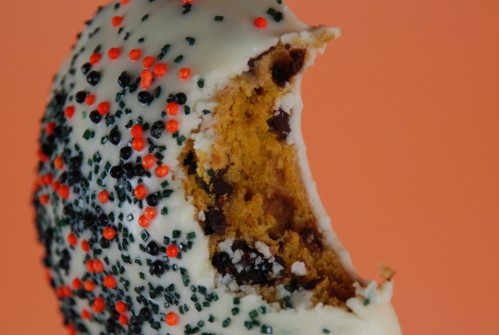
Halloween is near!  What a fun time of the year!  Do you have your costume yet?  As a kid I always loved getting dressed up and going out in the neighborhood to fill my bag with treats.  It’s also a fun time to make treats in the kitchen for the kids….and adults too!  This year I wanted to send my three nieces (ages 2 ½, 3 ½, and 5) in California a little treat for Halloween.  Last year with the girls being so young I opted to order cookies from William Sonoma and have them sent.  This year I decided to make something from scratch.  Things always taste better from scratch…right?  I tried to think of what they may like and I tossed around several ideas.  I first decided on pumpkin chocolate chip cookies as one of the things I would make them, but I wanted to do something a little different.  So I decided on turn them into lollipops, but even better then dipped in chocolate!  I had never done this so it was going to be a test and honestly I was hoping it would work.  Well, it did and I even took some into work to make sure they got the ok.  I’m not going to lie, these are time consuming but in the end they are so worth it.  I’m sure kids and adults will enjoy these lollipops.  The cookies are soft which means when you take your first bite it may taste like cake instead of a crunchy cookie.  I prefer the softer bite over the crunchy.   They are delicious and a great treat for your little ones this Halloween.  These treats are in route to California and should arrive tomorrow.  I will let you know what my nieces think when they arrive.

Below I have tried to give you the best directions I could, but feel free to ask questions.  Have fun in the kitchen making these.  If your kids are old enough they can join in on the fun.  And please enjoy!! 

Pumpkin Chocolate Chip Cookie Lollipops

Print Recipes

  • 1 cup whole white wheat flour
  • 1 cup all-purpose flour
  • ½ tsp baking powder
  • ½ tsp baking soda
  • 1 tsp pumpkin pie spice
  • ¼ tsp salt
  • ½ cup (1 stick) unsalted butter, at room temperature
  • 1 cup brown sugar
  • 1 egg
  • 1 heaping cup pumpkin puree
  • 3/4 cup mini semi sweet chocolate chips

Preheat oven to 375.  Line two baking sheets with parchment paper.

In a medium bowl, whisk together flours, baking powder, baking soda, pumpkin pie spice, and salt. Set aside.

Using an electric mixer, beat together butter and brown sugar until light and fluffy. Add egg; beat until smooth. With mixer on low speed, alternately add flour mixture in two parts and pumpkin puree in one, beginning and ending with flour mixture; mix just until combined (do not over mix).  Stir in mini chocolate chips.

To make lollipops:

Drop 1 to 1½ Tbsp scoops onto a baking sheet.  I found using an ice cream scoop worked great to shape the balls.  The cookie dough will be sticky so it’s better to place the balls on the sheet and then insert the lollipop sticks in the center of each ball.  Remember to do one ball at a time so you can see how much room you will have on your baking sheet.  Place each ball about 1 ½” apart with the sticks lying horizontally.  Once you have laid the cookies onto your sheet and inserted the lollipop sticks, lightly press down on each ball with wet fingers or the bottom of a glass (lightly floured) to flatten slightly.

Bake until puffed and edges are golden, about 15 to 20 minutes, rotating sheets once during baking.  Allow the cookies to cool on the pan on top of a wire rack for 5 minutes.  The carefully transfer lollipop cookies to a wire rack to cool completely.

To make cookies:

Follow complete mixing steps above.  Then drop dough by heaping tablespoons onto two prepared baking sheets, about 1 1/2 inches apart. Bake until puffed and edges are golden, 15 to 20 minutes, rotating sheets once during baking. Immediately transfer cookies to wire racks, and cool completely.

Pumpkin Chocolate Chip Cookies

NOTE: When I made these I did half as lollipops and half as regular cookies.

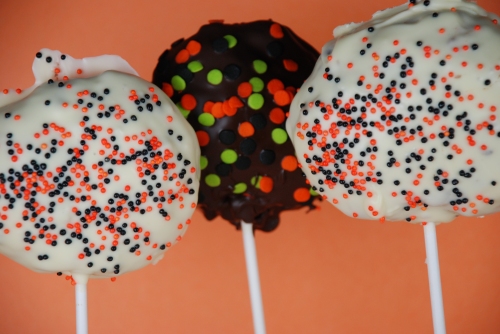
lollipops

Decorating Lollipops

You will need the following:

  • Halloween sprinkles (or any others of your choice) – a found a great variety pack at Target
  • Melting chocolate, White Chocolate or Semi-Sweet Chocolate – I prefer Mercken’s chocolate wafers but you can use Baker’s chocolate baking squares also.  Mercken’s you can find in a variety of colors which is another reason why I like them.  For this recipe I used the Baker’s chocolate and it worked great too.

Melt chocolate according to the package directions.  When using the Baker’s chocolate I melted a complete package at one time.  Remember to use a dish that will allow you to dip the lollipops in.

While the chocolate in melting, line a small baking sheet (or anything small in flat) with parchment paper.  You will be laying the lollipops on this once you have dipped them and then you will need to place in refrigerator to cool and dry.  This why I suggest using something small and flat above.  Especially if your refrigerator is anything like mine…not as big as you would like!

Once cookies are completely cooled, gently dip cookies into the chocolate coating the cookie completely.  Transfer cookie to prepared lined baking sheet and decorate with the sprinkles of choice.  Continue with the remaining lollipops. 

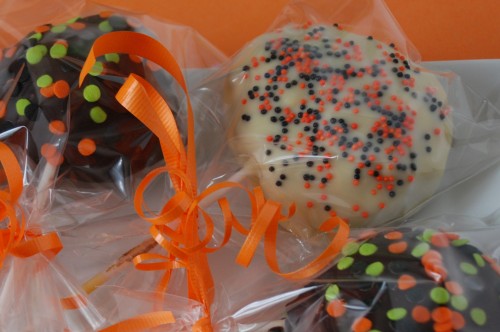
Transfer lollipops to refrigerator (or freezer) to dry or set the chocolate.  Then you can use lollipop bags to place the cookies and close with ribbon of choice. 

 lollipop wrap

I hope I was able to give you the best directions in making these fun lollipops.  If you have any questions please let me know and I will try my best to guide you thru the steps.

These will be a huge hit with everyone!  Enjoy your first bite and Happy Halloween!

lollipop bite

Read Full Post »

Pumpkin Cinnamon Rolls

This weekend we took the girls to the pumpkin patch to pick out their pumpkin.  Last year they were too young to realize what the pumpkin patch was all about.  They could barely even walk.  Amazing how one year can change so much.  For the past few weeks I’ve been trying to teach the girls the word “pumpkin”.  As soon as we pulled up to the pumpkin patch they started to say “pumpkin, pumpkin, pumpkin”, it truly was the cutest thing ever.  Then we got out of the car and they took off to pick out their pumpkin.  It was quite the adventure and in the end everyone got a pumpkin. 

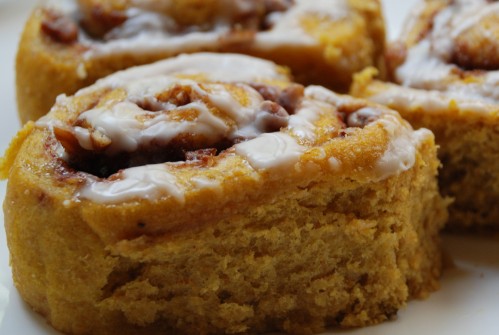
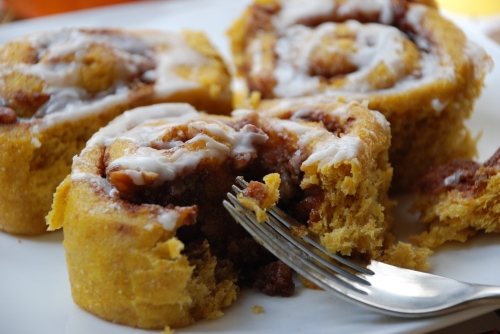
 After seeing all those pumpkins, I was in the pumpkin mood!  I then thought, what can I make with one of my fall favorite ingredients?  So many choices and I have to admit I went a little crazy and I’ll probably end up posting a couple pumpkin recipes by week’s end.  To start off I have the yummy Pumpkin Cinnamon Rolls.  I love cinnamon rolls!  I don’t know why but they are one of my weakness.  What’s better then combining pumpkin and cinnamon all in a yummy gooey roll?  I’ll let you decide, but I know they were delicious!  To help me not feel as guilty as a bit into my roll on Sunday morning I added whole grain to the recipe.  This is a great fall morning breakfast treat.  It’s even great as a dessert!  Enjoy!

Pumpkin Cinnamon Buns

Pumpkin Cinnamon Rolls

Print Recipe


BUNS:

  • 1 package dry yeast (about 2 ¼ tsp)
  • ¼ cup warm water (100 to 110 degrees)
  • 1 ¾ cups white whole wheat flour
  • 1 cup all-purpose flour
  • ½ cup pumpkin puree
  • ½ cup 1% low-fat milk
  • ¼ cup unsalted butter, melted
  • 1 Tbsp light brown sugar
  • 2 tsp pumpkin pie spice
  • 1 tsp salt

FILLING:

  • 6 Tbsp light brown sugar
  • 2 Tbsp white whole wheat flour
  • 1 ½ tsp cinnamon
  • 2 Tbsp chilled unsalted butter, cut into cubes
  • ¼ cup chopped pecans (optional)

GLAZE:

  • ¾ cup sifted confectioners’ sugar
  • 1 Tbsp hot water
  • ¼ tsp vanilla extract

To prepare buns, dissolve yeast in warm water in the bowl of an electric mixer; let stand 5 minutes.

In a small bowl, sift together the two flours.  Make sure you level the flour with a knife.  Add 2 cups of the flour mixture, pumpkin, milk, butter, brown sugar, pumpkin pie spice and salt into the bowl with the yeast mixture.  Beat at medium speed until smooth.  Turn dough out onto a floured surface.  Knead until smooth and elastic (about 10 minutes); add enough of the remaining ¾ cup flour, 1 Tbsp at a time, to prevent dough from sticking to hands (dough will feel tacky).

Place dough in a large bowl coated with cooking spray, turning to coat top.  Cover and let rise in a warm place (85 degrees), free from drafts, for 45 minutes to an hour or until doubled in size.  Press two fingers into dough.  If an indentation remains, the dough has risen enough.

Combine brown sugar, 2 Tbsp flour and cinnamon in a small bowl.  Cut in butter with a pastry blender or 2 knives until mixture resembles coarse meal.  Stir in chopped pans if using.

Punch down dough; cover and let rest for 5 minutes.  Roll the dough into 12 x 10-inch rectangle on a floured surface.  Sprinkle with brown sugar mixture.  Roll up the rectangle tightly, starting with a long edge, pressing firmly to eliminate air pockets; pinch seam and ends to seal.  Cut roll into 12 (i-inch) slices.  Place slices in a 9-inch square baking pan coated with cooking spray.  Cover and let rise 25 minutes or until doubled in size.

Preheat oven to 375.

Bake the rolls at 375 for 20 minutes or until golden brown.  Cool for 15 minutes in a pan on a wire rack.

To prepare glaze, combine confectioners’ sugar, 1 tablespoon water, and vanilla extract in a small bowl, stirring with a whisk or spoon until smooth.  Drizzle glaze over buns.  Serve warm.

Here is a picture of my little monsters at the pumpkin patch….

Girls - Pumpkin Patch

Read Full Post »

Shrimp and Grits


wedding - color

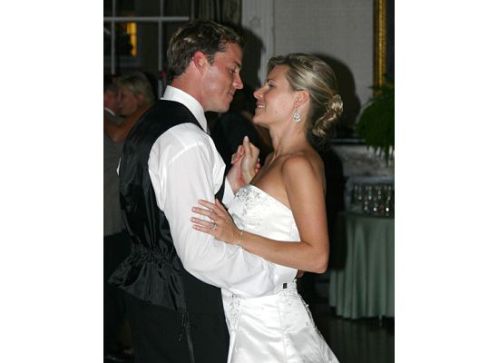
Sorry for the absence!  On Friday my husband I celebrated our 5th wedding anniversary.  It’s hard to believe 5 years ago in Charleston, SC we stood in front of friends and family and said our “I Do’s”.  I guess time flies when you’re having fun!  For our anniversary, Scott surprised me with a small getaway.  Ok, it wasn’t too far from home but it was one day away from being “mommy and daddy”.  He even surprised me with my mom coming in town to stay with the girls while we took off.  Thanks mom!!  The short getaway was a well needed break and we enjoyed every minute of it!  We have shared a lot in these 5 years and I have to say I couldn’t ask for a better husband and friend.  Not only that but he is a amazing daddy!  I couldn’t do it without him.

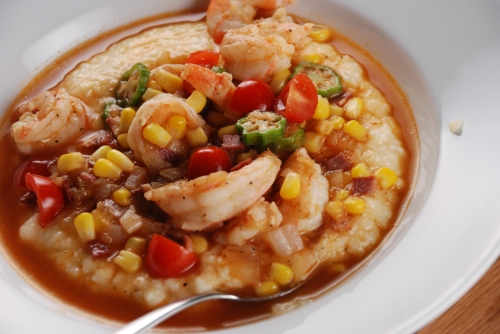
To thank my husband for his thoughtfulness and to celebrate our anniversary, I decided to make one of his favorite southern dishes….Shrimp and Grits.  I have to say I never tried shrimp and grits until the first time Scott took me to his hometown of Charleston.  If you have never been to Charleston please try to make a trip.  It is truly an amazing city.  I fell in love with the city the moment I got there and secretly wish that one day we can live there.  We even got married there which is another reason why we love that city.  Shrimp and Grits are a classic dish in Charleston and I knew once I tasted it I too needed to learn how to make it.  There are a variety of ways the dish can be made but I prefer this recipe.  I make my own shrimp stock for the dish but I’m assuming you can use chicken or vegetable broth if you prefer.  However, if you have the time the shrimp stock really is great and adds a lot of flavor to the dish.  This entry is long so I won’t write too much more.  Don’t be intimidated by the length of the recipe it really isn’t that hard…trust me.  Enjoy this favorite southern dish!! 


Shrimp Broth – Makes about 2 quarts of stock

Print Recipe

  • 2 Tbsp butter
  • Shells from 1-2 pounds of shrimp
  • 2 Tbsp tomato paste
  • 1 clove garlic
  • 1 celery stalk, chopped
  • 1 to 2 carrots, chopped
  • 1 medium onion, chopped
  • 2 sprigs of parsley
  • 3 bay leaves
  • 2 sprigs of thyme
  • 1 star anise
  • 3 whole cloves
  • 5 whole coriander seeds
  • 7 black pepper corns
  • ½ cup white wine
  • About 1-2 quarts of water

Place butter in medium stock pot over medium-high heat.  When melted, add shrimp shells, and cook until shells are pink and just starting to turn golden brown.

Add tomato paste, garlic, celery, carrots, onion, parsley, bay leaves, thyme, star anise, cloves, coriander seeds, and peppercorns to the pot and continue to cook for about 2-3 minutes.

Add the white wine to the pot (mixture will boil up vigorously), and cook until the wine is reduced to an almost syrupy consistency.

Add enough water to the pot to barely cover the shells, and bring water to a simmer.

Simmer for 30-45 minutes, and strain through a fine strainer.  Throw away shells and vegetables, and reserve stock.


Shrimp and Cheese Grits

Adapted from Charleston Cooks

  • 2-3 bacon slices, diced (I used turkey bacon)
  • 1 clove garlic, minced
  • ½ onion, chopped
  • 2 tsp blackening season
  • ¼ pound shrimp, de-veined and shelled
  • 1 ear corn, shucked and kernels cut off cob
  • 6-8 okra, sliced into rounds
  • 8-12 grape tomatoes, halved
  • 1 recipe shrimp stock
  • 2 Tbsp butter


Place the bacon in a large sauté pan, and cook over medium heat until lightly golden brown.

Add the garlic and onion to the pan, and sauté over medium heat until onion is translucent.

Add the blackening season to the pan, and sauté in the bacon fat until aromatic.  Next add the shrimp and allow them to sit in the pan untouched for one minute.  Do not stir.

Add the corn, okra, and tomatoes to the pan and stir to incorporate.  Add enough shrimp stock to cover shrimp about halfway.

Bring the stock to a boil, and reduce sauce slightly.  Turn off the heat and fold in the butter to finish.


Cheese Grits

  • 3 ½ cups water
  • ¾ cups grits
  • ¼ tsp salt
  • ¾ cup shredded cheese (I used 2%)
  • ½ cup milk (more depending on how thick or thin you prefer your grits)

Place water in a saucepan and bring to a boil.  Slowly stir in grits and salt.  Reduce heat to low; cover.  Cook 15 to 20 minutes or until thickened, stirring occasionally.  Remove from heat and add cheese and milk.  Add salt and pepper to taste.

Place grits and bowl and top with the shrimp mix and enjoy!

Read Full Post »

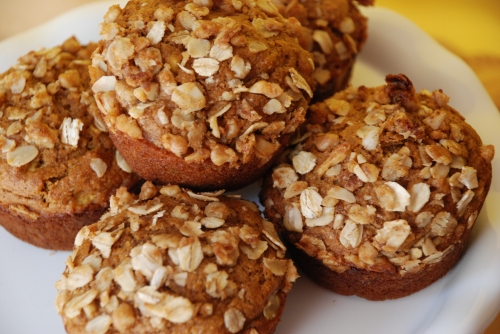
Whole Wheat Pumpkin Apple Muffins


Fall is here…well it’s arrived everywhere else but South Florida.  I think it almost hit 90 today!  It’s mid-October and it’s 90 degrees with humidity….yuck!!  Fall is one of my favorite seasons, and while growing up in Atlanta I looked forward to the weather cooling off and the leaves changing.  It meant Halloween was on its way and Thanksgiving wasn’t too far behind.  It meant pulling out the sweaters and your jackets.  It also meant that the smell of pumpkin filled the house.  I always miss “home” around this time of the year.  So to help me handle the homesick feeling I’ve had lately I decided to make these Pumpkin Apple Muffins.  I can’t explain it, but baking and cooking is like a calming healing thing for me.  I know very weird, but I guess that’s why I love it.  Ok, back to the muffins…. Pumpkin is one of my favorite ingredients and honestly I use it year round.  Then there are apples which I love and this time of year they are everywhere.  I had pumpkin puree left over and a lot of apples so I thought I would combine the two and make muffins.  I added a sweet crunchy topping that adds a lot to the muffins.  As usual I added whole grains to these delicious bites.  As I took my first bite of the muffin it made me feel like it was fall outside.  As I’m typing this the weatherman says a cold front is coming in a few days which will bring our highs down to about 82.  Of course when it’s January and cold everywhere else I will then remember why living in South Florida as benefits.  For all of you out there enjoying the fall weather I hope you also find these muffins enjoyable!  Happy Fall and happy baking!


Whole Wheat Apple Pumpkin Muffins

Print Recipe

  • 2 cups whole wheat pastry flour
  • 1 tsp baking powder
  • 1 tsp baking soda
  • ¼ tsp salt
  • 1 Tbsp pumpkin pie spice
  • ¼ cup unsalted butter, softened
  • ¼ cup unsweetened applesauce
  • ¼ cup sucanat (you can use all light brown sugar if you don’t have sucanat)
  • ½ cup light brown sugar
  • 1 large egg
  • 1 cup Greek yogurt (0% or 2%)
  • 1 large apple, peeled, cored, and coarsely chopped
  • 1 cup pumpkin

Topping:

  • ¾ cup old-fashioned rolled oats
  • 1/3 cup packed light brown sugar
  • ½ tsp ground cinnamon
  • ¼ tsp salt
  • 2 Tbsp unsalted butter, melted
  • ¼ cup pecans, chopped

Preheat oven to 450. Spray muffin tin with cooking spray or line with paper muffin cups and set aside.

Mix together in a medium bowl the flour, baking powder, baking soda, salt and pumpkin pie spice.

In the bowl of an electric mixer, cream the butter and applesauce with the sucanat and brown sugar.  Add the egg and mix well; stop once to scrape the sides and bottom of the bowl.  Mix in the yogurt and pumpkin.  Stir in the dry ingredients and fold in the apple pieces.

To make topping, combine the oats, brown sugar, cinnamon and salt in a small mixing bowl until well blended.  Stir in the melted butter until the moisture forms large crumbs; stir in the chopped nuts.  Divide the batter evenly among prepared muffin cups and sprinkle the topping over the batter.

Bake for 10 minutes, then turn the temperature down to 400 and bake an additional 5 minutes, or until a toothpick inserted into the center of a muffin comes out clean.  Cool the muffins for 5 minutes in the muffin tin, then turn them out onto a wire rack to cool completely.  Serve warm with butter.

Makes about 12 to 16 muffins

Read Full Post »

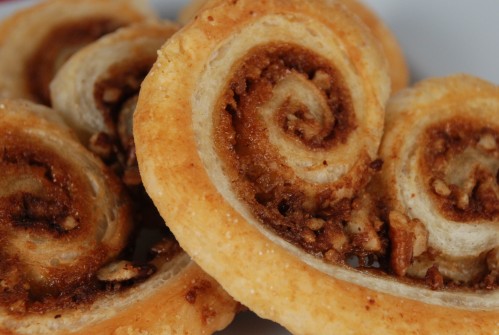
Cinnamon Sugar Palmier


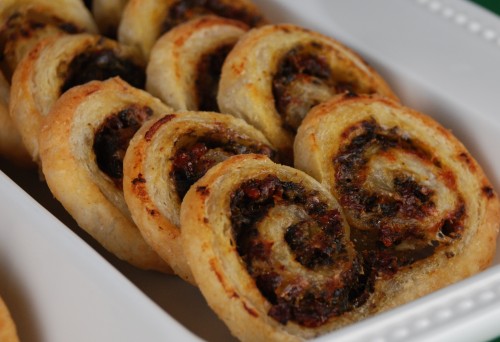
A few nights ago I decided to try something I have never tried before in my kitchen….palmiers.  I think I’ve never tried to make these pastries because I thought they might be too difficult.  Then I thought to myself how hard could it really be?  To answer that question for all of you out there…not hard at all!  I have to say having the right puff pastry makes these little delicious bites that much better.  I use Dufour Puff Pastry which I found at my local Whole Foods Market.  This pastry is quality stuff and it’s made with real butter and not those other hidden fats you see in other puff pastries.  If you can’t find it you can also order from their website.  On to my adventure with Palmiers!  Not only did I decide to try palmiers but I decided to try two kinds.  A sweet and a savory!  I’ll start off with the sweet since everyone loves a sweet.  At least in my house everyone loves a sweet.  These are super easy and absolutely delicious.  I have to remind you I made these at night so as we all know by now natural light is the best way to capture beautiful photography of food.  Instead I used my new Lowel Ego Digital lights that I’m still trying to figure out.  Some of the photos of the steps may be a little dark.  Bare with me as I try to get better.  On to the recipe but remember I did half savory and half sweet so if you only want to do one version double the recipe for the filling.

Cinnamon Pecan Palmier

  • Half of package all butter Puff Pastry (as mentioned above)
  • 1/3 cup light brown sugar
  • 1 tsp cinnamon
  • 4 Tbsp Pecans, Toasted

Preheat oven to 400.  Line a pan with parchment paper, a silicone mat, or greased and floured.

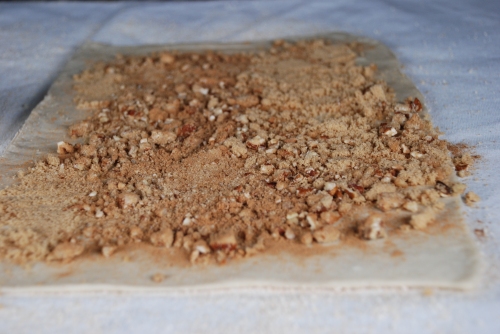
Mix together the brown sugar, cinnamon and pecans.  Set aside.

Unfold the thawed puff pastry onto the floured worked surface.  The Dufour Puff Pastry unfolds out of the package just about the length and width you’re looking for.  You’ll just need to roll it to thin it a bit, extending it about 1/2 to 1-inch on all sides.  Your puff pastry should be roughly 8(to10) x 12-inches in size.  Now spread the cinnamon sugar mixture over the pastry. 

Filling

Once evenly spread on pastry start rolling.  Roll up the left vertical side towards the center seam.  Roll the right vertical side towards the center too.  Gently press together.  Wrap in plastic wrap and refrigerate 30 minutes to an hour until cold and firm.

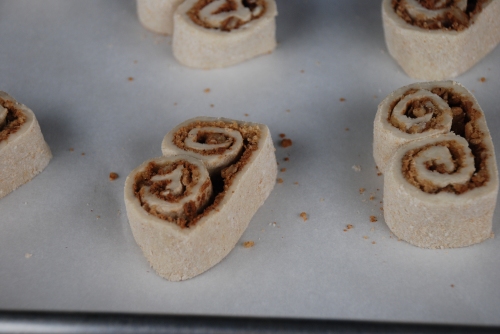
Remove dough from the fridge and slice in 1/2-inch slices.  

on pan - palmiers

Place on lined baking sheet.  Bake in 400 degree oven for 10 to 15 minutes or until golden brown.  You may want to rotate the baking sheet halfway through baking.  Keep a close eye on the pastries after about 11 minutes.  They might burn quickly.

If using just a greased and floured baking pan instead of a parchment or silicone lined pan, remove the pastries from the pan immediately after they come out of the oven.  If you’ve lined you baking sheet, you’re fine to let the cookies cool on the sheet.

Now on to the savory….

Savory Palmier

Savory Sundried Tomato Pesto Palmier

  • One package all butter Puff Pastry (as mentioned above)
  • 2 cups spinach
  • ½ cup fresh basil
  • 4 to 5 sundried tomatoes (I used the ones packed in oil because that’s all I had, but I rinsed mine in water to get a lot of the oil off)
  • ½ tsp olive oil
  • 1 Tbsp Parmesan Cheese, plus more 2 to 3 more for sprinkling over pesto.

For filling:

Combine the spinach, basil, sundried tomatoes, olive oil and cheese in a food processor and pulse until mixture reaches a paste.

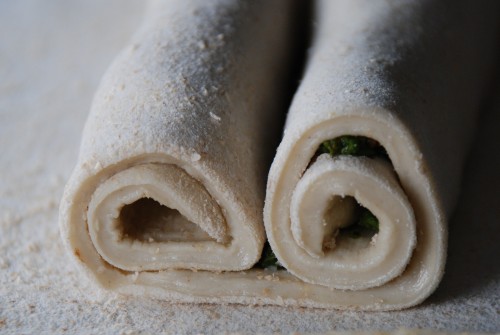
Using the other half of the pastry spread the pesto mixture over the pastry.  Once evenly spread on pastry sprinkle the pesto with the remaining parmesan cheese, then start rolling.  Roll up the left vertical side towards the center seam.  Roll the right vertical side towards the center too.  Gently press together. 

Savory Palmier rolled

Wrap in plastic wrap and refrigerate 30 minutes to an hour until cold and firm.

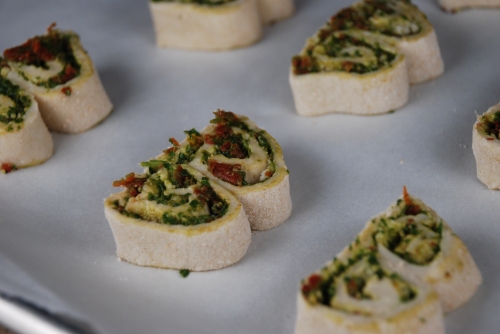
Remove dough from the fridge and slice in 1/2-inch slices.  Place on lined baking sheet.  

Pesto Palmier

Bake in 400 degree oven for 10 to 15 minutes or until golden brown.  You may want to rotate the baking sheet halfway through baking.  Keep a close eye on the pastries after about 11 minutes.  They might burn quickly.

If using just a greased and floured baking pan instead of a parchment or silicone lined pan, remove the pastries from the pan immediately after they come out of the oven.  If you’ve lined you baking sheet, you’re fine to let the cookies cool on the sheet.

If you have never stopped by Joy the Baker she has a great step by step direction on Palmiers.

Read Full Post »

French Toast Sticks

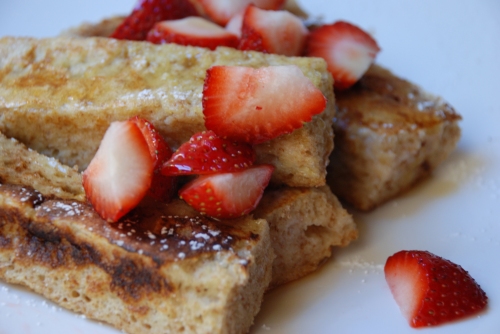
Ok, so I posted a not so healthy French Toast recipe a few weeks ago so I thought it was time for a healthier version.  I made these French Toast Sticks this past Sunday and they were quick and easy.  I guess that’s been the motto the past two days, but with twin toddlers in the house quick and easy is perfect.  In this recipe I used a whole wheat baguette for the bread (to get the whole grains in there) and instead of using all eggs I used half egg whites and half eggs.  I really like cinnamon so I used a little more then you may want.  You decide what is best for your needs.  As for topping, I really like fresh fruit and this also allowed me to use a smaller amount of syrup.  My husband on the other hand loaded his with butter and syrup, but he can get away with it.  I hope that our daughters get his metabolism!  Either way these are delicious and a great breakfast for the whole family on weekend mornings.  If you have leftovers you can freeze them and heat them up during the weekends.  Look at the note at the end of the recipe for tips on freezing.  Enjoy! 

French Toast Sticks

  • 3 egg whites
  • 3 eggs
  • 1 cup low-fat milk (or soy milk)
  • ½ tsp cinnamon
  • ¼ tsp nutmeg, ground
  • 1 Tbsp olive oil
  • 6 slices whole wheat French bread, each cut into 4 4-inch (1/2 inch thick) pieces


In a shallow bowl, combine egg, egg whites, milk, cinnamon and nutmeg. 

Heat oil in a large nonstick skillet over medium heat.  Dip both sides of bread pieces in egg mixture.

 Cooking in batches, place bread pieces in a single layer in skillet and cook 3 to 5 minutes on each side, or until lightly browned and egg is cooked through.  Serve with topping of choice. 

The French Toast Sticks can be frozen in an airtight container for up to 2 weeks.  To enjoy, remove from freezer and thaw completely.  Heat in a skillet coated with olive oil cooking spray over medium heat for 2 to 4 minutes or until heated.

Read Full Post »

Older Posts »